I love Emacs. It is a programmable text editor that streamlined many of my workflows. Nowadays, I do most of my computer-related tasks via Emacs, and writing is one of them.
$\LaTeX$ is the industry standard when it comes to publishing scientific documents. The problem is, sometimes writing .tex documents can be tedious due to LaTeX’s complicated syntax. That is why I use simpler markup formats (like .org or .markdown) to write documents, convert them to .tex and later compile the converted .tex into pdf files.
The procedure I usually take is to use Emacs’ Org-mode. Org-mode is a major mode for note taking and writing documents that is exclusive to Emacs users. Using .org files, I can write long documents in a minimal manner, then export to pdf with beautiful typesettings by using the Org-mode’s export functionalities.
In this post, I will describe my setups and workflows for writing pdf documents with Org-mode. Note that you may need basic knowledge of LaTeX and Emacs to undertand what I am saying.
Org-mode configuration
Org-mode is built-in in recent versions of Emacs, so you do not need to install them if you already have Emacs installed. You only have to load the corresponding packages for Org-mode and Org-export. The simplest way is to have the following lines in your .emacs, located in your home directory:
(require 'org)
(require 'ox-latex)
As I use the document class scrartcl for most of my documents, I add it to the variable org-latex-classes:
;; Add KOMA-scripts classes to org export
(add-to-list 'org-latex-classes
             '("koma-article" "\\documentclass{scrartcl}"
               ("\\section{%s}" . "\\section*{%s}")
               ("\\subsection{%s}" . "\\subsection*{%s}")
               ("\\subsubsection{%s}" . "\\subsubsection*{%s}")
               ("\\paragraph{%s}" . "\\paragraph*{%s}")
               ("\\subparagraph{%s}" . "\\subparagraph*{%s}")))
Now, in my documents, if I set the latex document class to koma-article (as you can see in the example below), whenever I prefix a line with an asterisk, followed by one space (* ...), the Org exporter will automatically convert it into \section{...} in converted .tex files. Two asterisks are translated into \subsection{...}, and so on… Org-mode also supports many other markup features as you can learn further in its manual.
Also, I predefined the packages that will be automatically added to .tex files exported using Org-mode:
;; Default packages
(setq org-latex-default-packages-alist
      '(("AUTO" "inputenc" t
         ("pdflatex"))
        ("T1" "fontenc" t
         ("pdflatex"))
        ("" "graphicx" t)
        ("" "grffile" t)
        ("" "longtable" nil)
        ("" "wrapfig" nil)
        ("" "rotating" nil)
        ("normalem" "ulem" t)
        ("" "amsmath" t)
        ("" "textcomp" t)
        ("" "amssymb" t)
        ("" "capt-of" nil)
        ("dvipsnames" "xcolor" nil)
        ("colorlinks=true, linkcolor=Blue, citecolor=BrickRed, urlcolor=PineGreen" "hyperref" nil)
	    ("" "indentfirst" nil)))
Because I usually include codes in my documents, I set up the minted package for auto-highlighting source codes:
(setq org-latex-listings 'minted
      org-latex-packages-alist '(("" "minted"))
      org-latex-minted-options '(("breaklines" "true")
                                 ("breakanywhere" "true")
                                 ("mathescape")
                                 ("frame" "lines")
                                 ("bgcolor" "yellow!5")))
Lastly, I use the tool latexmk to automatically compile the .tex files into .pdf documents. Normally, writing documents that include references (using bibtex) or glossaries/acronyms (using acronym) require you to run chains of commands on a single .tex file several times, but latexmk simplify this process.
(setq org-latex-pdf-process
      '("latexmk -pdflatex='%latex -shell-escape -interaction nonstopmode' -pdf -output-directory=%o -f %f"))
Example
To present an example, I will be exporting my whole emacs configuration file into pdf. I have already written the config file in .org format and you can find it here.
Update: The same org-file was also converted into this post.
Note that in the beginning of the .org file, you must provide some metadata as below:
#+title:and#+author:The document title and author#+latex_class:The LaTeX document style#+latex_compiler:The LaTeX compiler. Its default value ispdflatex. I usexelatexwhen my document contains Unicode characters (often Vietnamese).
When the document is ready for publish, press C-c C-e to run the org-export-dispatch command.
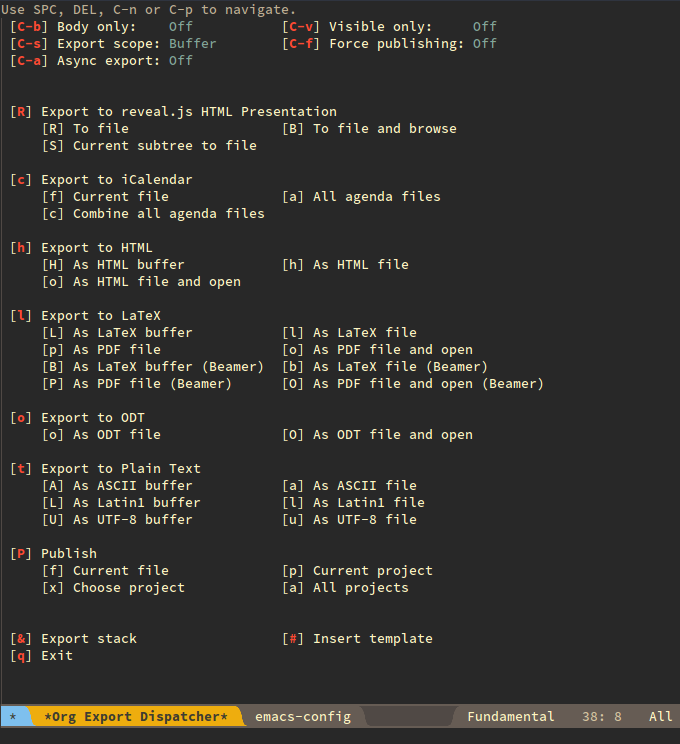
For me, the Org-mode Export Dispatcher looks something like this
The dispacher interface is intuitive and should be self-explanatory. You have the options to export to many formats from an .org file: plain text, html or beamer slides, etc… If you want to convert to a particular format, search for the package named ox-<something> and load it in, as I did with ox-latex.
Here, I press l to choose the “Export to LaTeX” section and p for “As pdf file”. The Org Exporter will:
- Convert my document from
.orgformat to my desired.texformat, and - Run the
latexmkcommand defined above to compile my.texfile to pdf.
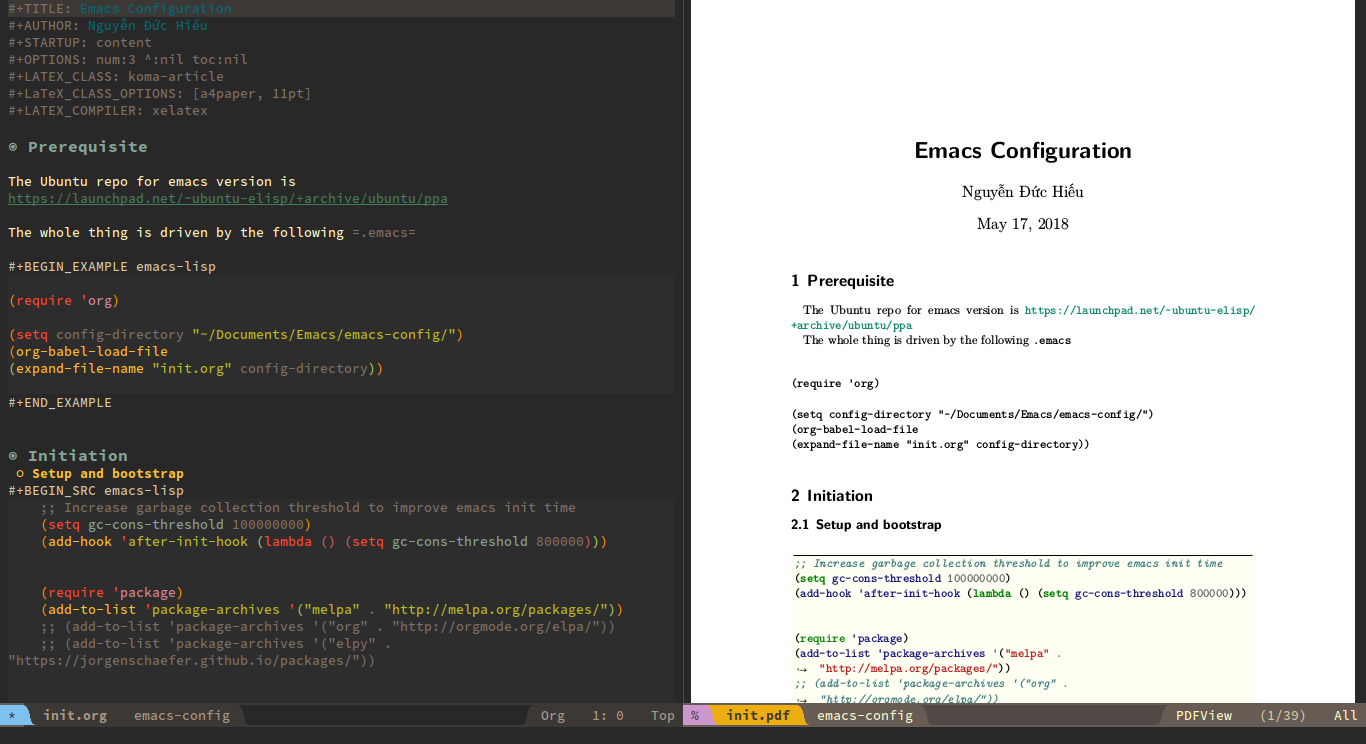
You can see the exported pdf next to the original org file in the screenshot below. The pdf is nicely rendered with hyperlinks, automated section numbering and highlighted source code:
Going through this process, you may feel like this is overcomplicated just to create a pdf document. The point is: I only have to set this up once. From now on, I can always benefit from the professional typesetting that $\LaTeX$ provides, while writing in the simple markup syntax of Org-mode.